Introduction
You'll build a small reactor core out of fuel pins and control rods, run a real Monte Carlo neutron simulation in OpenMC, and see where the power is produced. Then you'll change the design and watch the results move.
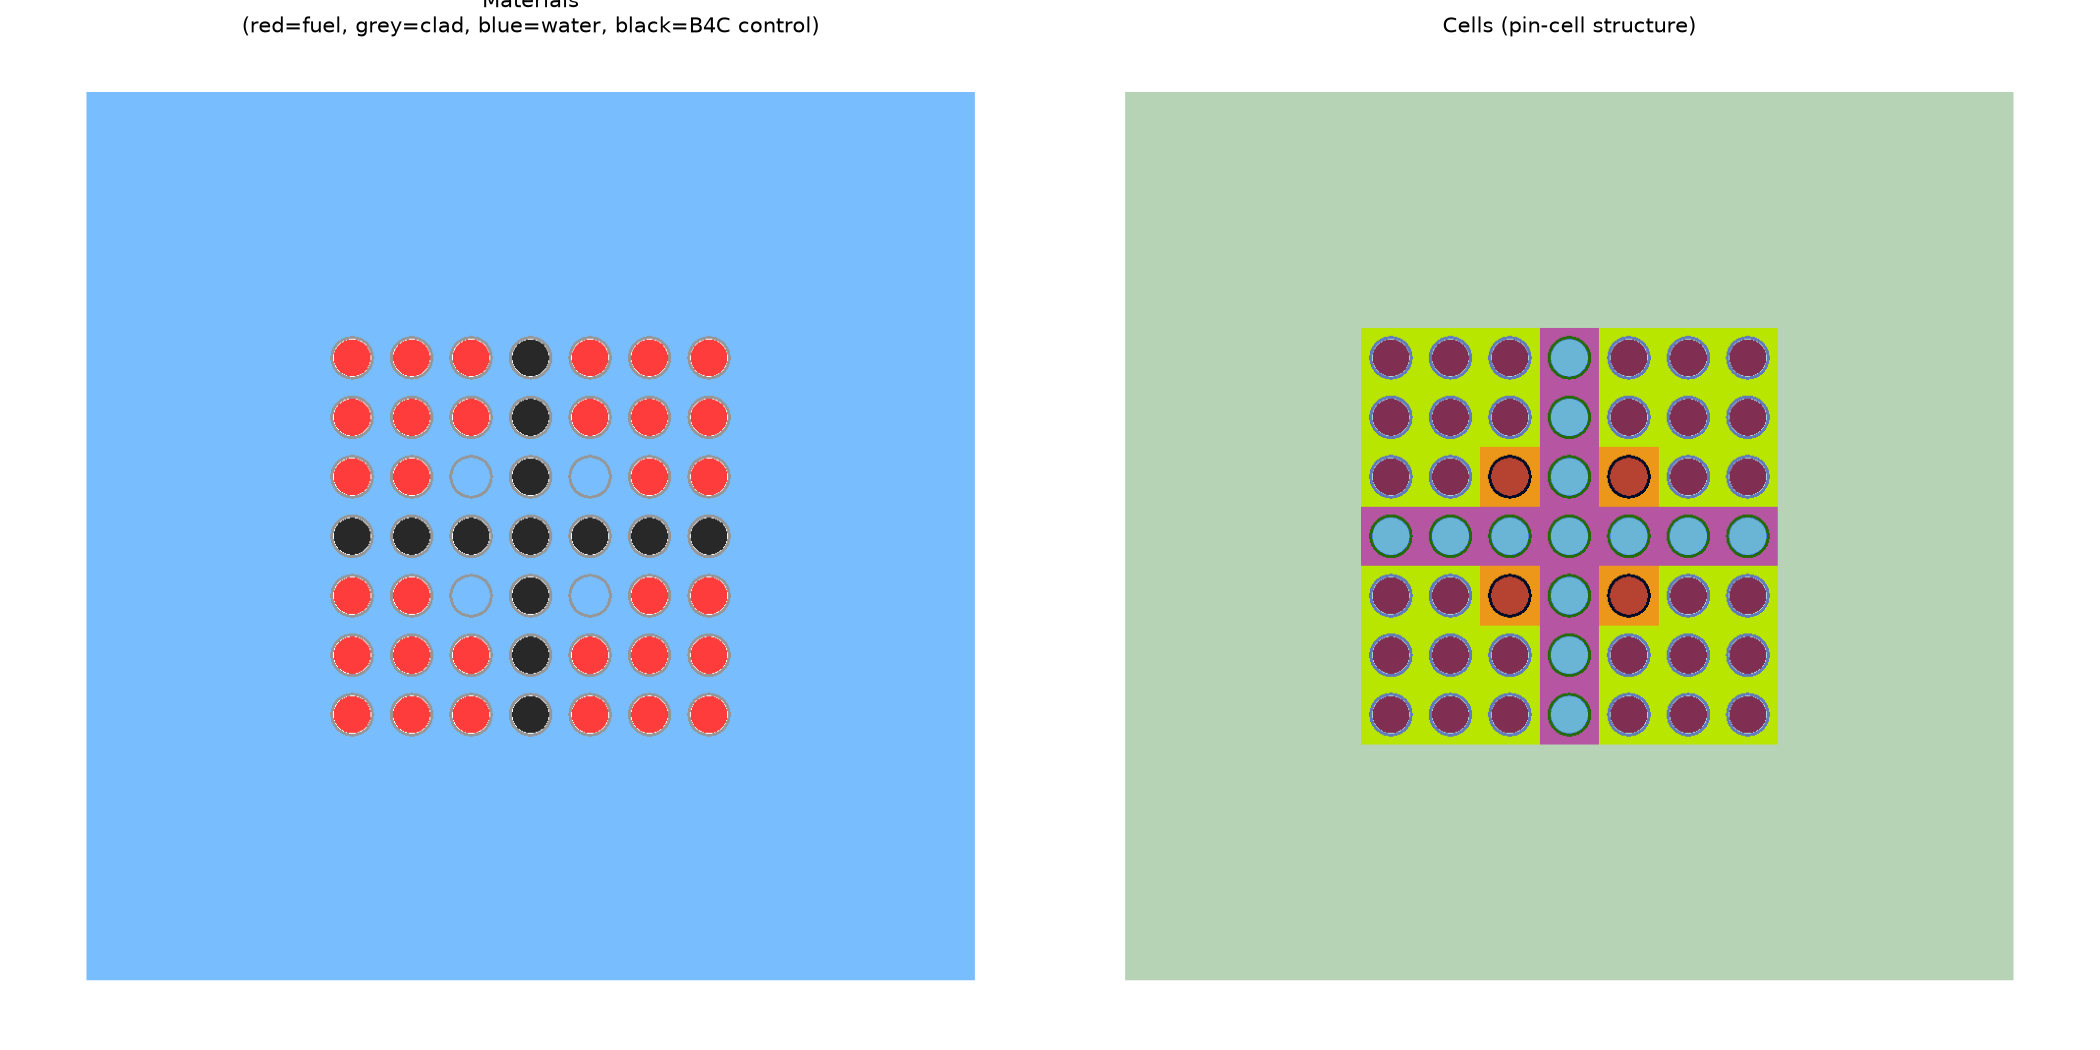
Please do steps 1 and 2 before the session. The one-time install takes 5 to 10 minutes. After that, everything runs in seconds.
Download the project
Get set up — step 1.
Run in Google Colab — no local installation
Download both files below. Open Google Colab, sign in, and choose File → Upload notebook to open Firefly_003_Colab.ipynb. Use a Python 3 CPU runtime; no GPU is needed.
Run cell A and wait for its automatic restart, then run B to install OpenMC and C to upload the workshop ZIP. Continue through the workshop cells in order. Initial setup takes several minutes. On a phone, use Safari or Chrome; desktop view may be easier. Colab files are temporary, so download your results before disconnecting.
For Colab, keep the ZIP compressed and upload it in cell C. For a local install, unzip it and follow the instructions below. The ZIP includes the nuclear data; Colab installs the software separately.
Run the setup script
Get set up — step 2. Follow the instructions for your platform.
Both platforms are shown below. Select a platform heading to collapse or expand its instructions.
macOS / Linux
Open Terminal, then type cd (with a space), drag the unzipped folder into the window, and press Enter. Then run:
./setup.shIt installs everything into your home folder (no admin password) and opens the notebook in your browser. On Apple Silicon Macs, say yes if macOS asks to install Rosetta.
Windows / WSL
OpenMC runs on Windows through WSL (Windows' built-in Linux).
- Open PowerShell as Administrator, run
wsl --install, and restart your PC. - Open the Ubuntu app from the Start menu and run the commands below. Replace
YOUR_NAMEwith your Windows username.
sudo apt update && sudo apt install -y unzip curl
cp /mnt/c/Users/YOUR_NAME/Downloads/openmc-reactor-circle.zip ~ && cd ~
unzip openmc-reactor-circle.zip && cd openmc-reactor-circle
./setup.sh
Then copy the http://localhost:8888/... link it prints into your browser.
Check your install: run ./setup.sh --check. It runs the whole simulation without opening a browser and prints a success check mark when everything works.
In the session
Run ./setup.sh from the project folder. In the notebook that opens, run the cells from top to bottom with Shift + Enter.
What you'll see
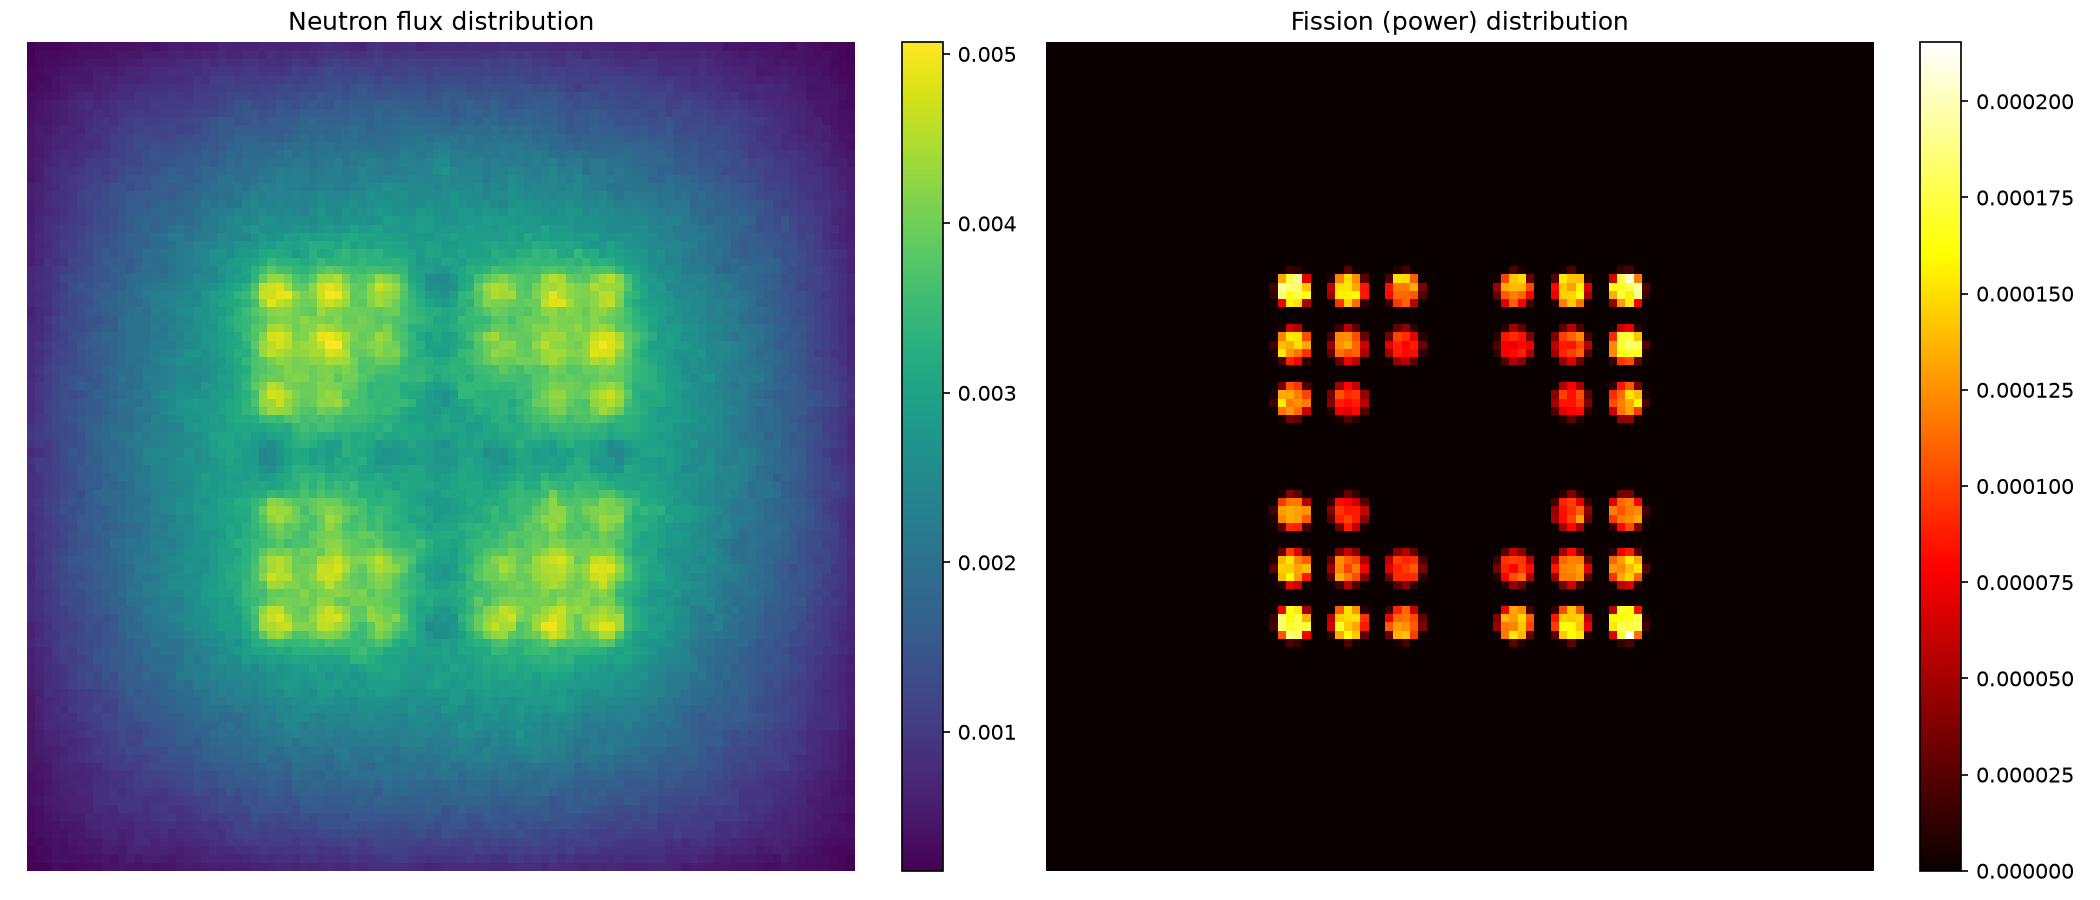
k-effective = 0.139 ± 0.002 means the core is strongly subcritical with every control rod in. In the experiments, you'll find out what pushes it toward 1.0.
Stuck?
-
permission denied: ./setup.shRunbash setup.shinstead. -
Browser didn't open
Copy the
http://localhost:8888/...link from the terminal. - "Nuclear data MISSING" in the notebook Open it from inside the unzipped folder.
Teaching model with realistic PWR-like dimensions. It is not a validated reactor design.